通过ADS将MySQL数据库简单连接(ads连接mysql)
通过ADS将MySQL数据库简单连接
Apache 数据服务(Apache ADS)是一个开源软件,旨在为业务应用程序提供高效的数据访问服务。它支持关系性数据库、NoSQL数据库、文件系统和其他数据存储。在这篇文章中,我们将学习如何使用ADS连接MySQL数据库。
步骤1 – 安装ADS:
我们需要安装ADS。可以在官网上下载安装包(http://directory.apache.org/apacheds/downloads.html)。下载并解压缩文件之后,我们需要安装Java JDK,并设置环境变量。然后运行以下命令启动ADS:
“`bash
./apacheds.sh start
如果一切正常,你应该看到ADS启动的信息。
步骤2 - 创建MySQL数据库:
在连接MySQL之前,我们需要有一个MySQL数据库。在这里我们将介绍如何创建一个MySQL数据库。
打开终端,登录MySQL:
```bashmysql -u root -p
创建一个名为“tutorial”的数据库:
“`bash
CREATE DATABASE tutorial;
创建一个名为“users”的表:
```bashCREATE TABLE users (
  id INT(6) UNSIGNED AUTO_INCREMENT PRIMARY KEY,  firstname VARCHAR(30) NOT NULL,
  lastname VARCHAR(30) NOT NULL,  eml VARCHAR(50)
);
在“users”表中插入一些数据:
“`bash
INSERT INTO users (firstname, lastname, eml) VALUES (‘John’, ‘Doe’, ‘john.doe@example.com’);
INSERT INTO users (firstname, lastname, eml) VALUES (‘Jane’, ‘Doe’, ‘jane.doe@example.com’);
INSERT INTO users (firstname, lastname, eml) VALUES (‘Bob’, ‘Smith’, ‘bob.smith@example.com’);
步骤3 - 添加MySQL数据源:
现在我们将创建一个新的MySQL数据源。打开ADS的管理控制台,在左侧导航栏中选择“Partitions”:

选择“Create Partition”:

在“Create Partition”对话框中,输入以下信息:
| 字段 | 值 || ---------- | ------------------ |
| Partition | MySQL || Partition ID | mysql |
| Server Host | localhost || Server Port | 3306 |
| Principal | cn=admin,dc=example |
这些值可能需要根据你的MySQL服务器配置进行修改。文件d:\apacheDS\partitions\mysql\conf\config.ldif,需要手动创建
dn: ads-partitionId=mysql,ou=partitions,ads-directoryServiceId=default,ou=config
objectClass: top
objectClass: ads-partition
ads-partitionSuffix: dc=mysql,dc=com
ads-jdbmPartitionOptimizerEnabled: true
ads-partitionCacheSize: 1000
ads-contextEntry:: YmxvY2tsaXN0IGRjPWNvbQ==
ads-partitionId: mysql
ads-cachesize: 1000
ads-enabled: TRUE
dn: ads-indexAttributeId=uid,ou=indexes,ads-partitionId=mysql,ou=partitions,ads-directoryServiceId=default,ou=config
objectClass: top
objectClass: ads-base
objectClass: ads-index
ads-indexAttributeId: uid
ads-indexCacheSize: 100
ads-indexHasReverse: TRUE
ads-indexNumDupLimit: 128
ads-enabled: TRUE
dn: ads-indexAttributeId=objectClass,ou=indexes,ads-partitionId=mysql,ou=partitions,ads-directoryServiceId=default,ou=config
objectClass: top
objectClass: ads-base
objectClass: ads-index
ads-indexAttributeId: objectClass
ads-indexCacheSize: 1000
ads-indexHasReverse: FALSE
ads-indexNumDupLimit: 5000
ads-enabled: TRUE
dn: ads-indexAttributeId=cn,ou=indexes,ads-partitionId=mysql,ou=partitions,ads-directoryServiceId=default,ou=config
objectClass: top
objectClass: ads-base
objectClass: ads-index
ads-indexAttributeId: cn
ads-indexCacheSize: 1000
ads-indexHasReverse: TRUE
ads-indexNumDupLimit: 128
ads-enabled: TRUE
保存并关闭对话框。
步骤4 - 测试连接:
现在我们可以测试这个MySQL数据源是否工作正常。在ADS控制台左侧导航栏中,选择“Connections”:

选择“Create Connection”:

在“Create Connection”对话框中输入以下信息:
| 字段 | 值 || --------------- | ------ |
| Connection Name | MySQL || Parent Partition | mysql |
| User | root || Password | [password] |
然后选择“Test Connection”,如果连接成功,将看到以下信息:
输出:
INFO [org.apache.directory.jdbc.core.DataSourceConnectionFactory] – Created DataSource jdbc:mysql://localhost:3306/tutorial?verifyServerCertificate=false&useSSL=false&requireSSL=false&autoReconnect=true using driver com.mysql.jdbc.Driver
INFO org.apache.directory.jdbc.core.DataSourceConnectionFactory – Successfully created a new connection
步骤5 - 查询MySQL数据:
现在我们已经成功地连接到MySQL数据库,接下来我们将尝试使用ADS查询MySQL数据库中的数据。
在ADS控制台左侧的导航栏中,选择“Studio”:

选择“New Query”,然后输入以下查询:
```sqlSELECT * FROM users;
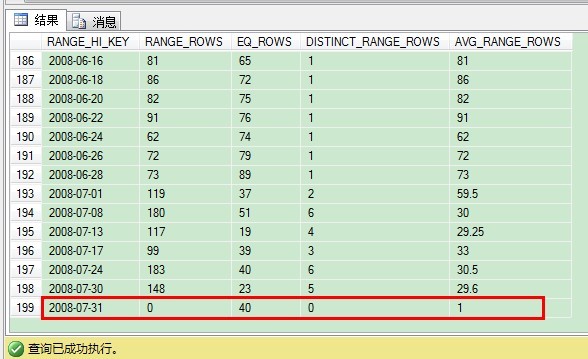
结果将如下所示:

我们可以看到MySQL数据库中的数据已经被成功地检索了出来。
总结:
在本文中,我们学习了如何使用ADS连接到MySQL数据库,并进行简单的查询操作。ADS是一个非常有用的工具,适用于所有类型的业务应用程序,并支持多种数据存储类型。如果你正在寻找一种高效的、跨平台的数据访问方案,那么ADS是一个不错的选择。