
Linux 下的zabbix agent监控部署及配置方法详解
1.在web01上安装zabbix-agent
部署zabbix仓库
rpm -Uvh https://mirrors.aliyun.com/zabbix/zabbix/5.0/rhel/7/x86_64/zabbix-release-5.0-1.el7.noarch.rpm
更换仓库中的url地址
sed -i 's#http://repo.zabbix.com#https://mirrors.aliyun.com/zabbix#' /etc/yum.repos.d/zabbix.repo
安装agent
yum -y install zabbix-agent
修改配置文件/etc/zabbix/zabbix_agentd.conf
Server=192.168.1.71
ListenPort=10050
#StartAgents=0
#ServerActive=192.168.1.71
Hostname=web01
说明:
- Server: 被动模式访问的zabbix-server的ip
- ServerActive: 主动模式访问的zabbix-server的ip
- StartAgents :zabbix_agentd用来处理被动检查的实例数量,如果设置为0,则禁用被动模式检查而且agent不再监听任何tcp端口
防火墙开启端口

启动服务
systemctl start zabbix-agent systemctl enable zabbix-agent

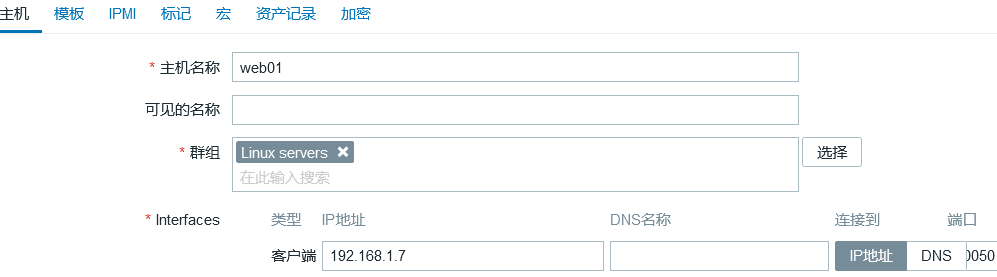
2.在zabbix-server的web页面点击配置—主机
点击右上角 创建主机:
点击模板,选择Template OS Linux by Zabbix agent

点击更新,在主机列表中出现如下:

选择 监测—主机—web01,即可开始观看各种监控数据和图形。
1.在web01上安装zabbix-agent
部署zabbix仓库
rpm -Uvh https://mirrors.aliyun.com/zabbix/zabbix/5.0/rhel/7/x86_64/zabbix-release-5.0-1.el7.noarch.rpm
更换仓库中的url地址
sed -i 's#http://repo.zabbix.com#https://mirrors.aliyun.com/zabbix#' /etc/yum.repos.d/zabbix.repo
安装agent
yum -y install zabbix-agent
修改配置文件/etc/zabbix/zabbix_agentd.conf
Server=192.168.1.71
ListenPort=10050
#StartAgents=0
#ServerActive=192.168.1.71
Hostname=web01
说明:
- Server: 被动模式访问的zabbix-server的ip
- ServerActive: 主动模式访问的zabbix-server的ip
- StartAgents :zabbix_agentd用来处理被动检查的实例数量,如果设置为0,则禁用被动模式检查而且agent不再监听任何tcp端口
防火墙开启端口
启动服务
systemctl start zabbix-agent systemctl enable zabbix-agent
2.在zabbix-server的web页面点击配置—主机
点击右上角 创建主机:
点击模板,选择Template OS Linux by Zabbix agent
点击更新,在主机列表中出现如下:
选择 监测—主机—web01,即可开始观看各种监控数据和图形。
以上就是本文的全部内容,希望对大家的学习有所帮助,也希望大家多多支持。
