
Linux下安装Redis的实现过程及报错解决方法
今天安装redis出现些之前安装不曾出现错误,一并在此做个记录
一、安装redis及出现错误
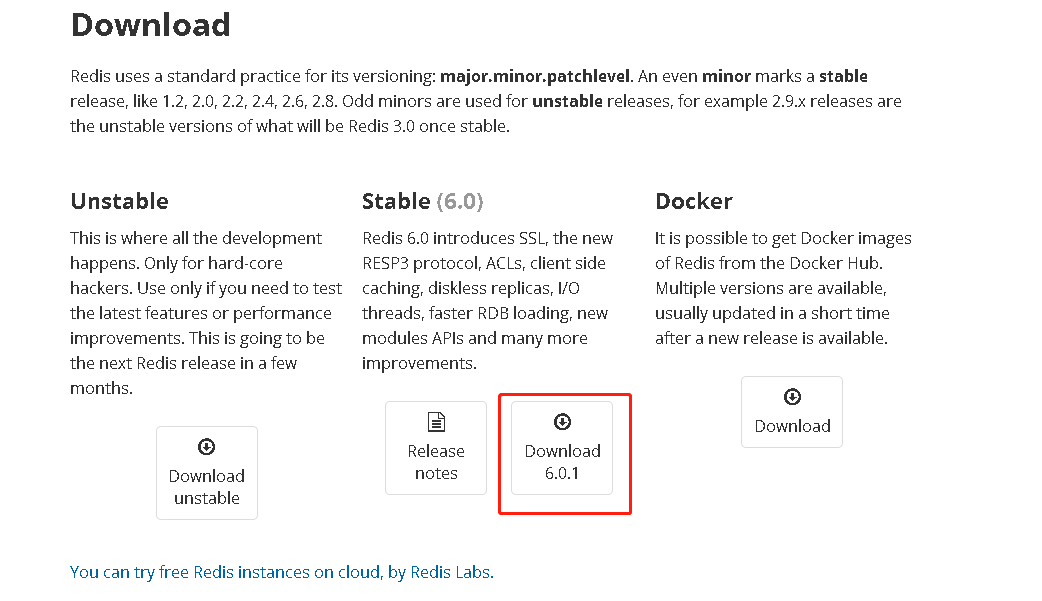
首先下载redis,官方下载地址页面:https://redis.io/download
我们这里选择稳定版6.0.1版本
正常安装步骤如下:
[root@localhost ~]# yum install gcc
[root@localhost ~]# cd /usr/local
[root@localhost local]# wget http://download.redis.io/releases/redis-6.0.1.tar.gz
[root@localhost local]# tar -xvf redis-6.0.1.tar.gz
[root@localhost local]# cd /usr/local/redis-6.0.1/
[root@localhost redis-6.0.1]# make PREFIX=/usr/local/redis install
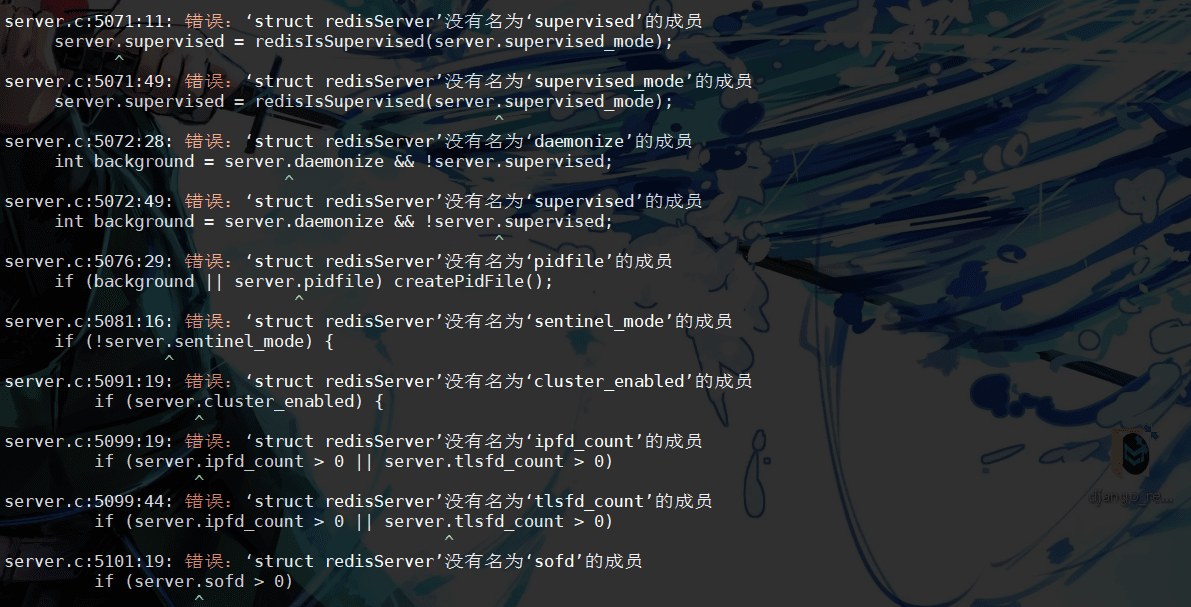
这里报了如下错误
make[1]: *** [server.o] 错误 1
make[1]: 离开目录“/usr/redis-6.0.1/src”
make: *** [all] 错误 2
server.c:2402:11: 错误:‘struct redisServer’没有名为‘assert_file’的成员
server.assert_file = “<no file>”;
^
server.c:2403:11: 错误:‘struct redisServer’没有名为‘assert_line’的成员
server.assert_line = 0;
^
server.c:2404:11: 错误:‘struct redisServer’没有名为‘bug_report_start’的成员
server.bug_report_start = 0;
^
server.c:2405:11: 错误:‘struct redisServer’没有名为‘watchdog_period’的成员
server.watchdog_period = 0;
^
server.c:2411:11: 错误:‘struct redisServer’没有名为‘lua_always_replicate_commands’的成员
server.lua_always_replicate_commands = 1;
^
server.c: 在函数‘restartServer’中:
server.c:2464:32: 错误:‘struct redisServer’没有名为‘maxclients’的成员
for (j = 3; j < (int)server.maxclients + 1024; j++) {
^
server.c: 在函数‘adjustOpenFilesLimit’中:
server.c:2491:29: 错误:‘struct redisServer’没有名为‘maxclients’的成员
rlim_t maxfiles = server.maxclients+CONFIG_MIN_RESERVED_FDS;
^
server.c:2497:15: 错误:‘struct redisServer’没有名为‘maxclients’的成员
server.maxclients = 1024-CONFIG_MIN_RESERVED_FDS;
^
server.c:2529:53: 错误:‘struct redisServer’没有名为‘maxclients’的成员
unsigned int old_maxclients = server.maxclients;
^
server.c:2530:23: 错误:‘struct redisServer’没有名为‘maxclients’的成员
server.maxclients = bestlimit-CONFIG_MIN_RESERVED_FDS;
^
server.c:2554:59: 错误:‘struct redisServer’没有名为‘maxclients’的成员
(unsigned long long) bestlimit, server.maxclients);
^
server.c: 在函数‘checkTcpBacklogSettings’中:
server.c:2574:48: 错误:‘struct redisServer’没有名为‘tcp_backlog’的成员
if (somaxconn > 0 && somaxconn < server.tcp_backlog) {
^
server.c:2575:171: 错误:‘struct redisServer’没有名为‘tcp_backlog’的成员
serverLog(LL_WARNING,”WARNING: The TCP backlog setting of %d cannot be enforced because /proc/sys/net /core/somaxconn is set to the lower value of %d.”, server.tcp_backlog, somaxconn);


解决办法:升级gcc版本
[root@localhost redis-6.0.1]# gcc -v # 查看gcc版本
[root@localhost redis-6.0.1]# yum -y install centos-release-scl # 升级到9.1版本
[root@localhost redis-6.0.1]# yum -y install devtoolset-9-gcc devtoolset-9-gcc-c++ devtoolset-9-binutils
[root@localhost redis-6.0.1]# scl enable devtoolset-9 bash
以上为临时启用,如果要长期使用gcc 9.1的话:
[root@localhost redis-6.0.1]# echo “source /opt/rh/devtoolset-9/enable” >>/etc/profile
再执行编译:
[root@mmjredis redis-6.0.1]# make PREFIX=/usr/local/redis install
安装成功会出现:Hint: It’s a good idea to run ‘make test’ 😉
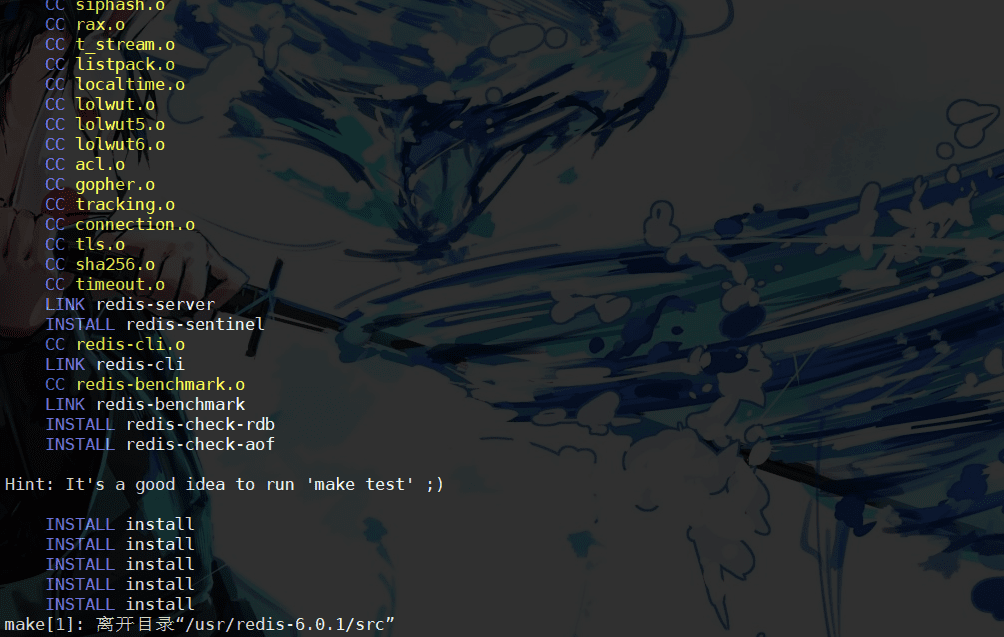
我们执行一下make test来进行测试一下
出现了如下错误:
[root@localhost redis-6.0.1]# make test
cd src && make test
make[1]: 进入目录“/usr/redis-6.0.1/src”
CC Makefile.dep
make[1]: 离开目录“/usr/redis-6.0.1/src”
make[1]: 进入目录“/usr/redis-6.0.1/src”
You need tcl 8.5 or newer in order to run the Redis test
make[1]: *** [test] 错误 1
make[1]: 离开目录“/usr/redis-6.0.1/src”
make: *** [test] 错误 2

解决办法:
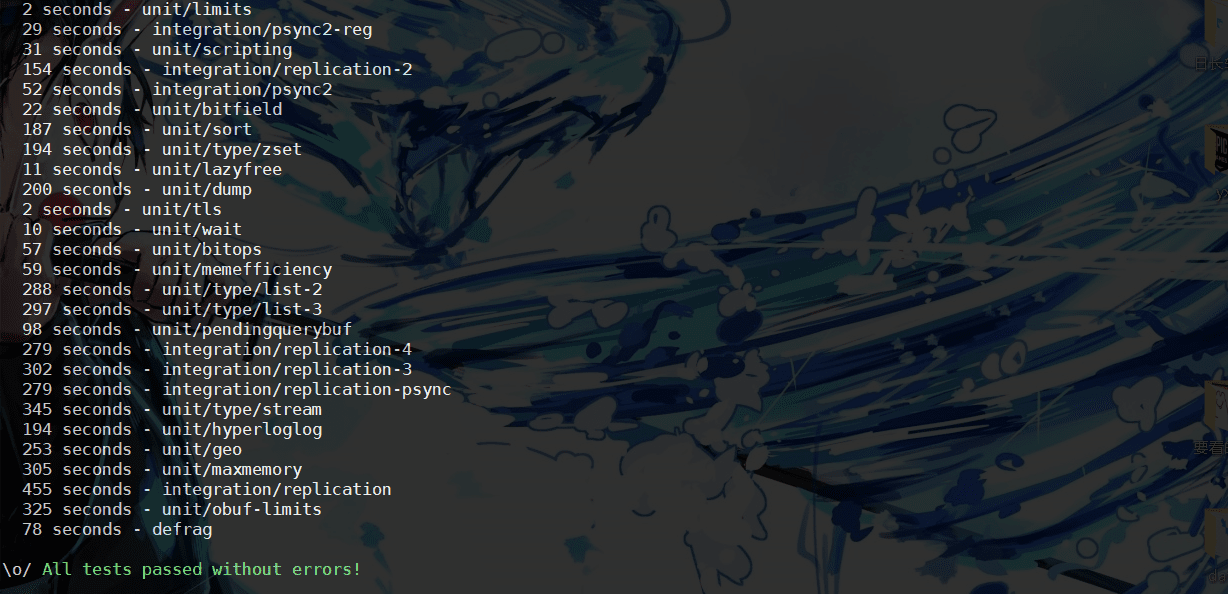
[root@localhost redis-6.0.1]# yum install tcl[root@localhost redis-6.0.1]# make test
测试成功如下:
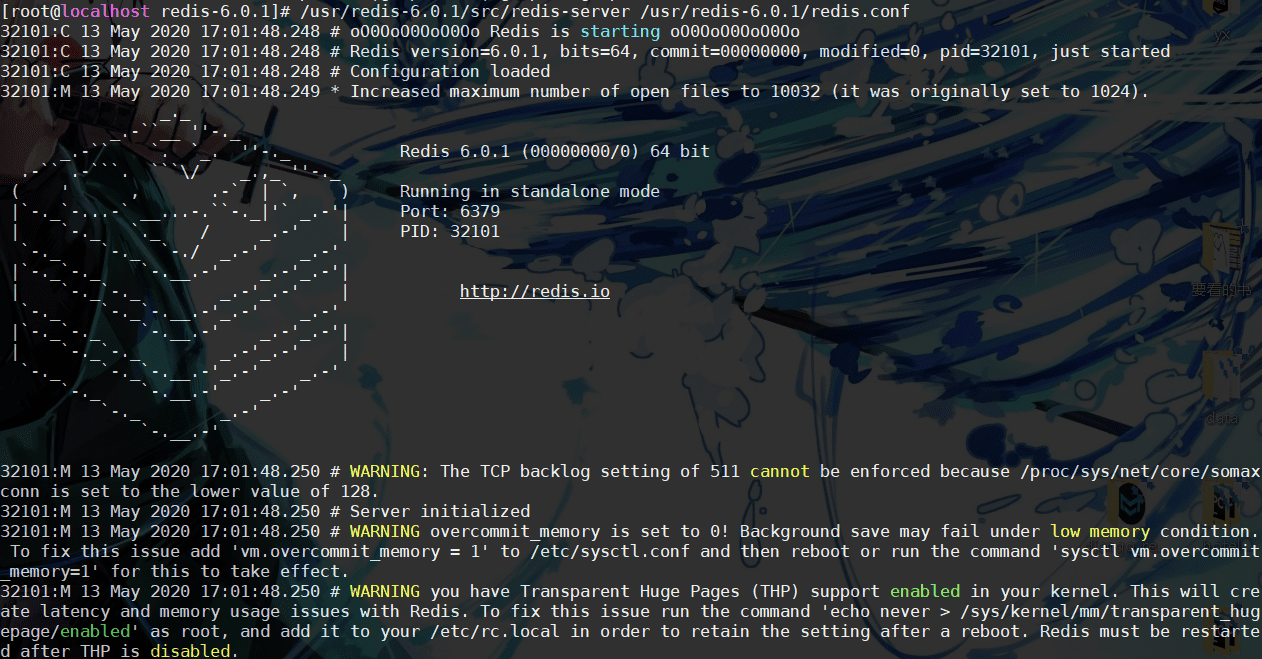
先运行redis试一下:
[root@localhost redis-6.0.1]# /usr/local/redis-6.0.1/src/redis-server /usr/local/redis-6.0.1/redis.conf
32101:C 13 May 2020 17:01:48.248 # oO0OoO0OoO0Oo Redis is starting oO0OoO0OoO0Oo
32101:C 13 May 2020 17:01:48.248 # Redis version=6.0.1, bits=64, commit=00000000, modified=0, pid=32101, just started
32101:C 13 May 2020 17:01:48.248 # Configuration loaded
32101:M 13 May 2020 17:01:48.249 * Increased maximum number of open files to 10032 (it was originally set to 1024).
        _._
      _.-``__ ''-._
   _.-``  `. `_. ''-._      Redis 6.0.1 (00000000/0) 64 bit
 .-`` .-```. ```\/  _.,_ ''-._
 (  '   ,    .-` | `,  )   Running in standalone mode
 |`-._`-...-` __...-.``-._|'` _.-'|   Port: 6379
 |  `-._  `._  /   _.-'  |   PID: 32101
 `-._  `-._ `-./ _.-'  _.-'
 |`-._`-._  `-.__.-'  _.-'_.-'|
 |  `-._`-._    _.-'_.-'  |      http://redis.io
 `-._  `-._`-.__.-'_.-'  _.-'
 |`-._`-._  `-.__.-'  _.-'_.-'|
 |  `-._`-._    _.-'_.-'  |
 `-._  `-._`-.__.-'_.-'  _.-'
   `-._  `-.__.-'  _.-'
     `-._    _.-'
       `-.__.-'
二、后台启动
简单修改后台启动
[root@localhost redis-6.0.1]# vim redis.conf
daemonize no 改成 daemonize yes
再来运行一下
[root@localhost redis-6.0.1]# /usr/redis-6.0.1/src/redis-server /usr/redis-6.0.1/redis.conf
30385:C 13 May 2020 16:57:58.918 # oO0OoO0OoO0Oo Redis is starting oO0OoO0OoO0Oo
30385:C 13 May 2020 16:57:58.918 # Redis version=6.0.1, bits=64, commit=00000000, modified=0, pid=30385, just started
30385:C 13 May 2020 16:57:58.918 # Configuration loaded
后台运行成功,我们查看一下,并终止程序
[root@localhost redis-6.0.1]# ps -aux|grep redis| grep -v grep
root 29836 0.0 0.0 162416 7912 ? Ssl 16:56 0:00 /usr/redis-6.0.1/src/redis-server 127.0.0.1:6379
[root@localhost redis-6.0.1]# kill -9 29836
我们这里用到的是用后台systemctl启动redis
首先把redis加入service服务
vim /lib/systemd/system/redis.service
写入
[Unit]
Description=redis
After=network.target[Service]
Type=forking
PIDFile=/var/run/redis_6379.pid
ExecStart=/usr/local/redis-6.0.1/src/redis-server /usr/local/redis-6.0.1/etc/redis.conf
ExecReload=/bin/kill -s HUP $MAINPID
ExecStop=/bin/kill -s QUIT $MAINPID
PrivateTmp=true[Install]
WantedBy=multi-user.target
注意路径问题,以及PIDFile的路径对应的是redis-6.0.1/src/redis-server里面的PIDFile
wq保存退出即可
接着运行以下
[root@localhost redis-6.0.1]# systemctl enable redis.service # 加入开机启动
[root@localhost redis-6.0.1]# systemctl is-enabled redis.service # 查看开机是否启动成功
enabled[root@localhost redis-6.0.1]# systemctl start redis #开启redis服务
[root@localhost redis-6.0.1]# systemctl status redis //查看redis运行状态
如果启动出现问题,可以通过systemctl status redis来查看日志修复
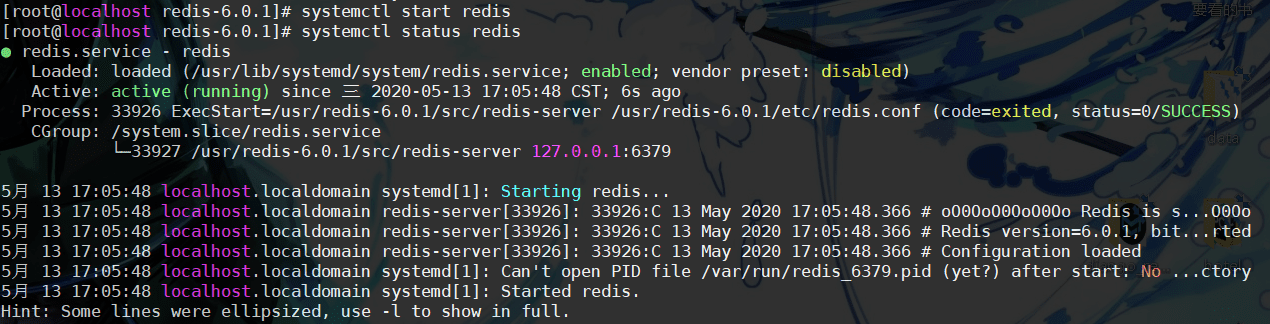
如图已经启动成功
今天安装redis出现些之前安装不曾出现错误,一并在此做个记录
一、安装redis及出现错误
首先下载redis,官方下载地址页面:https://redis.io/download
我们这里选择稳定版6.0.1版本
正常安装步骤如下:
[root@localhost ~]# yum install gcc
[root@localhost ~]# cd /usr/local
[root@localhost local]# wget http://download.redis.io/releases/redis-6.0.1.tar.gz
[root@localhost local]# tar -xvf redis-6.0.1.tar.gz
[root@localhost local]# cd /usr/local/redis-6.0.1/
[root@localhost redis-6.0.1]# make PREFIX=/usr/local/redis install
这里报了如下错误
make[1]: *** [server.o] 错误 1
make[1]: 离开目录“/usr/redis-6.0.1/src”
make: *** [all] 错误 2
server.c:2402:11: 错误:‘struct redisServer’没有名为‘assert_file’的成员
server.assert_file = “<no file>”;
^
server.c:2403:11: 错误:‘struct redisServer’没有名为‘assert_line’的成员
server.assert_line = 0;
^
server.c:2404:11: 错误:‘struct redisServer’没有名为‘bug_report_start’的成员
server.bug_report_start = 0;
^
server.c:2405:11: 错误:‘struct redisServer’没有名为‘watchdog_period’的成员
server.watchdog_period = 0;
^
server.c:2411:11: 错误:‘struct redisServer’没有名为‘lua_always_replicate_commands’的成员
server.lua_always_replicate_commands = 1;
^
server.c: 在函数‘restartServer’中:
server.c:2464:32: 错误:‘struct redisServer’没有名为‘maxclients’的成员
for (j = 3; j < (int)server.maxclients + 1024; j++) {
^
server.c: 在函数‘adjustOpenFilesLimit’中:
server.c:2491:29: 错误:‘struct redisServer’没有名为‘maxclients’的成员
rlim_t maxfiles = server.maxclients+CONFIG_MIN_RESERVED_FDS;
^
server.c:2497:15: 错误:‘struct redisServer’没有名为‘maxclients’的成员
server.maxclients = 1024-CONFIG_MIN_RESERVED_FDS;
^
server.c:2529:53: 错误:‘struct redisServer’没有名为‘maxclients’的成员
unsigned int old_maxclients = server.maxclients;
^
server.c:2530:23: 错误:‘struct redisServer’没有名为‘maxclients’的成员
server.maxclients = bestlimit-CONFIG_MIN_RESERVED_FDS;
^
server.c:2554:59: 错误:‘struct redisServer’没有名为‘maxclients’的成员
(unsigned long long) bestlimit, server.maxclients);
^
server.c: 在函数‘checkTcpBacklogSettings’中:
server.c:2574:48: 错误:‘struct redisServer’没有名为‘tcp_backlog’的成员
if (somaxconn > 0 && somaxconn < server.tcp_backlog) {
^
server.c:2575:171: 错误:‘struct redisServer’没有名为‘tcp_backlog’的成员
serverLog(LL_WARNING,”WARNING: The TCP backlog setting of %d cannot be enforced because /proc/sys/net /core/somaxconn is set to the lower value of %d.”, server.tcp_backlog, somaxconn);
解决办法:升级gcc版本
[root@localhost redis-6.0.1]# gcc -v # 查看gcc版本
[root@localhost redis-6.0.1]# yum -y install centos-release-scl # 升级到9.1版本
[root@localhost redis-6.0.1]# yum -y install devtoolset-9-gcc devtoolset-9-gcc-c++ devtoolset-9-binutils
[root@localhost redis-6.0.1]# scl enable devtoolset-9 bash
以上为临时启用,如果要长期使用gcc 9.1的话:
[root@localhost redis-6.0.1]# echo “source /opt/rh/devtoolset-9/enable” >>/etc/profile
再执行编译:
[root@mmjredis redis-6.0.1]# make PREFIX=/usr/local/redis install
安装成功会出现:Hint: It’s a good idea to run ‘make test’ 😉
我们执行一下make test来进行测试一下
出现了如下错误:
[root@localhost redis-6.0.1]# make test
cd src && make test
make[1]: 进入目录“/usr/redis-6.0.1/src”
CC Makefile.dep
make[1]: 离开目录“/usr/redis-6.0.1/src”
make[1]: 进入目录“/usr/redis-6.0.1/src”
You need tcl 8.5 or newer in order to run the Redis test
make[1]: *** [test] 错误 1
make[1]: 离开目录“/usr/redis-6.0.1/src”
make: *** [test] 错误 2
解决办法:
[root@localhost redis-6.0.1]# yum install tcl[root@localhost redis-6.0.1]# make test
测试成功如下:
先运行redis试一下:
[root@localhost redis-6.0.1]# /usr/local/redis-6.0.1/src/redis-server /usr/local/redis-6.0.1/redis.conf
32101:C 13 May 2020 17:01:48.248 # oO0OoO0OoO0Oo Redis is starting oO0OoO0OoO0Oo
32101:C 13 May 2020 17:01:48.248 # Redis version=6.0.1, bits=64, commit=00000000, modified=0, pid=32101, just started
32101:C 13 May 2020 17:01:48.248 # Configuration loaded
32101:M 13 May 2020 17:01:48.249 * Increased maximum number of open files to 10032 (it was originally set to 1024).
        _._
      _.-``__ ''-._
   _.-``  `. `_. ''-._      Redis 6.0.1 (00000000/0) 64 bit
 .-`` .-```. ```\/  _.,_ ''-._
 (  '   ,    .-` | `,  )   Running in standalone mode
 |`-._`-...-` __...-.``-._|'` _.-'|   Port: 6379
 |  `-._  `._  /   _.-'  |   PID: 32101
 `-._  `-._ `-./ _.-'  _.-'
 |`-._`-._  `-.__.-'  _.-'_.-'|
 |  `-._`-._    _.-'_.-'  |      http://redis.io
 `-._  `-._`-.__.-'_.-'  _.-'
 |`-._`-._  `-.__.-'  _.-'_.-'|
 |  `-._`-._    _.-'_.-'  |
 `-._  `-._`-.__.-'_.-'  _.-'
   `-._  `-.__.-'  _.-'
     `-._    _.-'
       `-.__.-'
二、后台启动
简单修改后台启动
[root@localhost redis-6.0.1]# vim redis.conf
daemonize no 改成 daemonize yes
再来运行一下
[root@localhost redis-6.0.1]# /usr/redis-6.0.1/src/redis-server /usr/redis-6.0.1/redis.conf
30385:C 13 May 2020 16:57:58.918 # oO0OoO0OoO0Oo Redis is starting oO0OoO0OoO0Oo
30385:C 13 May 2020 16:57:58.918 # Redis version=6.0.1, bits=64, commit=00000000, modified=0, pid=30385, just started
30385:C 13 May 2020 16:57:58.918 # Configuration loaded
后台运行成功,我们查看一下,并终止程序
[root@localhost redis-6.0.1]# ps -aux|grep redis| grep -v grep
root 29836 0.0 0.0 162416 7912 ? Ssl 16:56 0:00 /usr/redis-6.0.1/src/redis-server 127.0.0.1:6379
[root@localhost redis-6.0.1]# kill -9 29836
我们这里用到的是用后台systemctl启动redis
首先把redis加入service服务
vim /lib/systemd/system/redis.service
写入
[Unit]
Description=redis
After=network.target[Service]
Type=forking
PIDFile=/var/run/redis_6379.pid
ExecStart=/usr/local/redis-6.0.1/src/redis-server /usr/local/redis-6.0.1/etc/redis.conf
ExecReload=/bin/kill -s HUP $MAINPID
ExecStop=/bin/kill -s QUIT $MAINPID
PrivateTmp=true[Install]
WantedBy=multi-user.target
注意路径问题,以及PIDFile的路径对应的是redis-6.0.1/src/redis-server里面的PIDFile
wq保存退出即可
接着运行以下
[root@localhost redis-6.0.1]# systemctl enable redis.service # 加入开机启动
[root@localhost redis-6.0.1]# systemctl is-enabled redis.service # 查看开机是否启动成功
enabled[root@localhost redis-6.0.1]# systemctl start redis #开启redis服务
[root@localhost redis-6.0.1]# systemctl status redis //查看redis运行状态
如果启动出现问题,可以通过systemctl status redis来查看日志修复
如图已经启动成功
以上就是本文的全部内容,希望对大家的学习有所帮助,也希望大家多多支持。
